Building a custom Retarus Email Connector on SAP® BTP Integration Suite
Creating a custom Retarus Email connector on SAP BTP Integration Suite simplifies email operations within SAP applications by automating email processes and notifications. The connector ensures secure transmission of transactional business emails and allows for high delivery rates, efficient processing, and scalability. Businesses can enhance control and supervision over their email activities by handling email operations directly via SAP BTP Integration Suite. The integration guarantees real-time syncing of email data, ensuring that data shared between SAP applications and the Retarus Email API is always up to date.
To incorporate Retarus Enterprise Cloud products, such as Retarus Email, into the SAP BTP tenant environment, two key components are required:
Access to Retarus Email
To gain access, create and instantiate a custom connector for Retarus Email. As a result, an SAP-native cloud URL will be provisioned, enabling access to Retarus Email directly from within SAP. This tutorial provides step-by-step instructions on how to set up the connector.Integration of web service methods
The main purpose of the integration is to transform SAP content into the required Email REST API request headers, properties, and JSON payload for job transmission. This tutorial does not go into detail on the integration process.
Tip: To become familiar with the Retarus Email REST API, launch the Swagger UI and run some tests (the login ID, username, and password for Retarus Cloud Fax are required).
PREREQUISITES
SAP BTP
The SAP BTP cloud tenant ID and the password (also referred to as cloud secret) are available. When gaining access to an active instance of the integration solution, they are required to set up basic authentication. The essential information can be found in the API documentation’s curl statements. The service instance can be accessed using the unique SAP cloud URL provisioned within the operating service instance.
SAP BTP (Business Technology Platform) is operational.
SAP BTP Integration Suite is operational and has the following enabled capabilities:
- Open Connectors
- Cloud Integration (optional)
- API Management (optional)
RETARUS
For Retarus Cloud Fax, an active Retarus test agreement, proof of concept (PoC), or contract must already be in place and activated through a customer or developer account.
If a test agreement is required, fill out the contact form or speak with a Retarus representative.Account credentials (also known as “Login ID”) with a username and password.
Each Retarus customer typically has a single primary identifier for all booked services - the customer number. Multiple login IDs can be created for the same customer number (or tenant). This makes it possible to create different processing configurations to accommodate different people, departments, or purposes.
Building a custom Retarus SMS connector
Importing an API specification
The required actions are described “from scratch,” but SAP may provide pre-built packages or artifacts that include the connector and the integration flow for download.
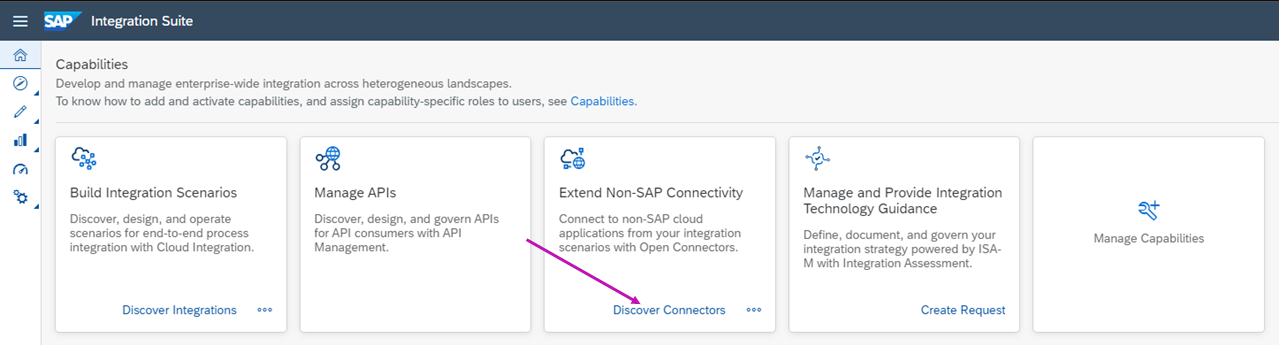
Open the SAP Integration Suite Home page, and scroll down to the Capabilities section.
Under Extend Non-SAP Connectivity, select Discover Connectors.

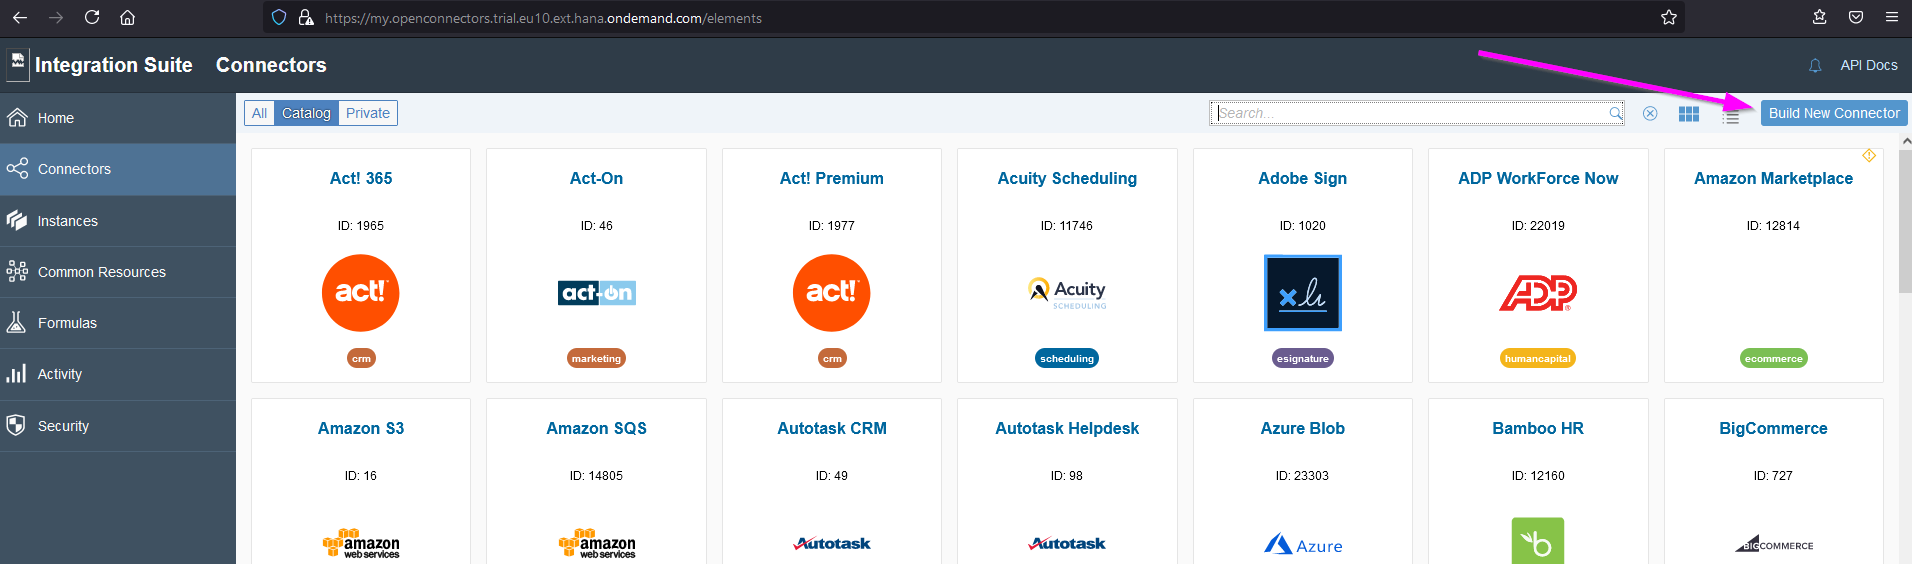
Navigate to the Connectors page, and select Build New Connector.

Select Import.
Retarus Email (REST) comes with a defined Swagger/OpenAPI specification. This specification can be used to make the service and its methods available within SAP easily and with minimal effort.
Select Swagger.

Navigate to the Select the file field.

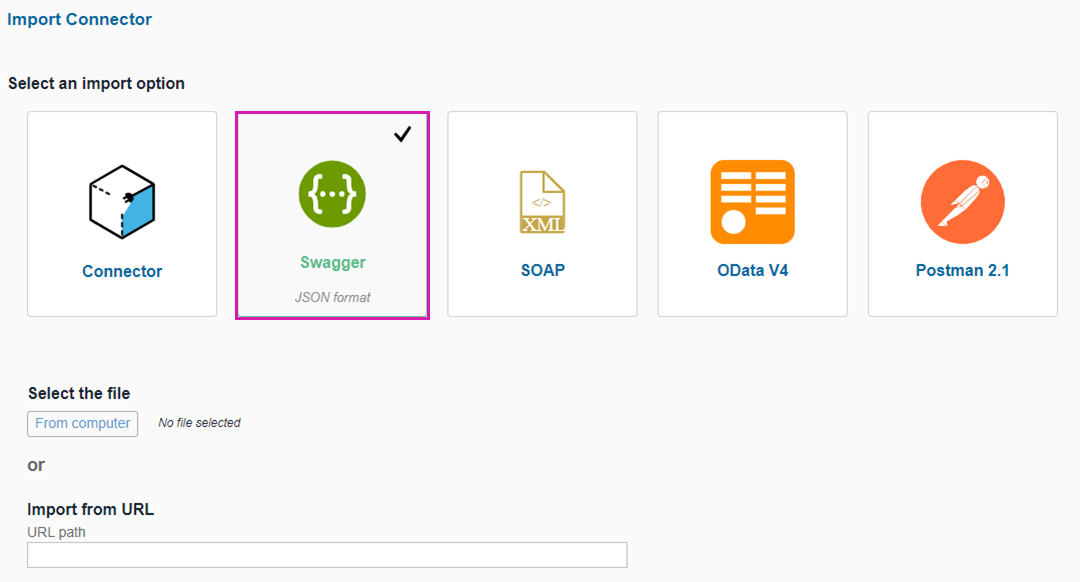
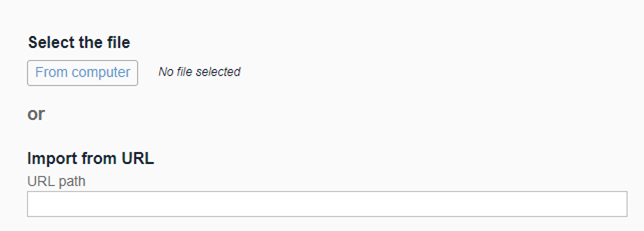
As of now, SAP BTP Open Connectors only accept JSON format for input. Download this API file to your computer, select From computer, and choose the downloaded file.
Select Continue import in the upper right corner.
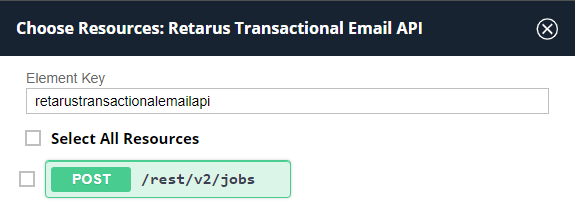
The REST resource selector is displayed. As the Retarus Email API only has one resource, select it.

Select the Import button in the lower right corner.
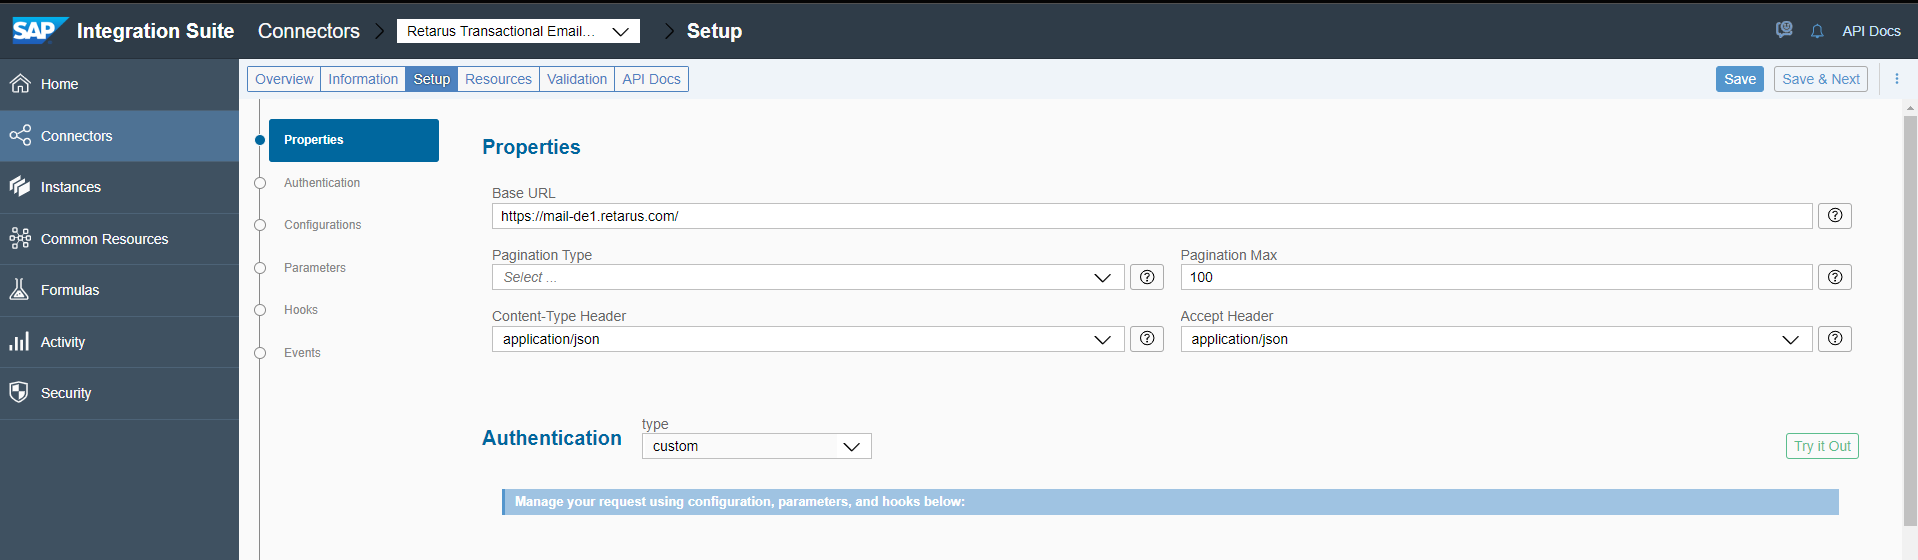
The connector configuration page with the Setup tab opens.
If the base URL for Retarus Email isn’t automatically imported from the API definition, enter it manually - https://mail-de.retarus.com/ .
Keep the other fields in the Properties section at their default settings.Select basic as the authentication method.
Two new fields for entering a user name and a password appear. It is not necessary to provide the username and password in this step. These details can be entered while starting a running instance of the connector, which is described in the following section.
Select Save.

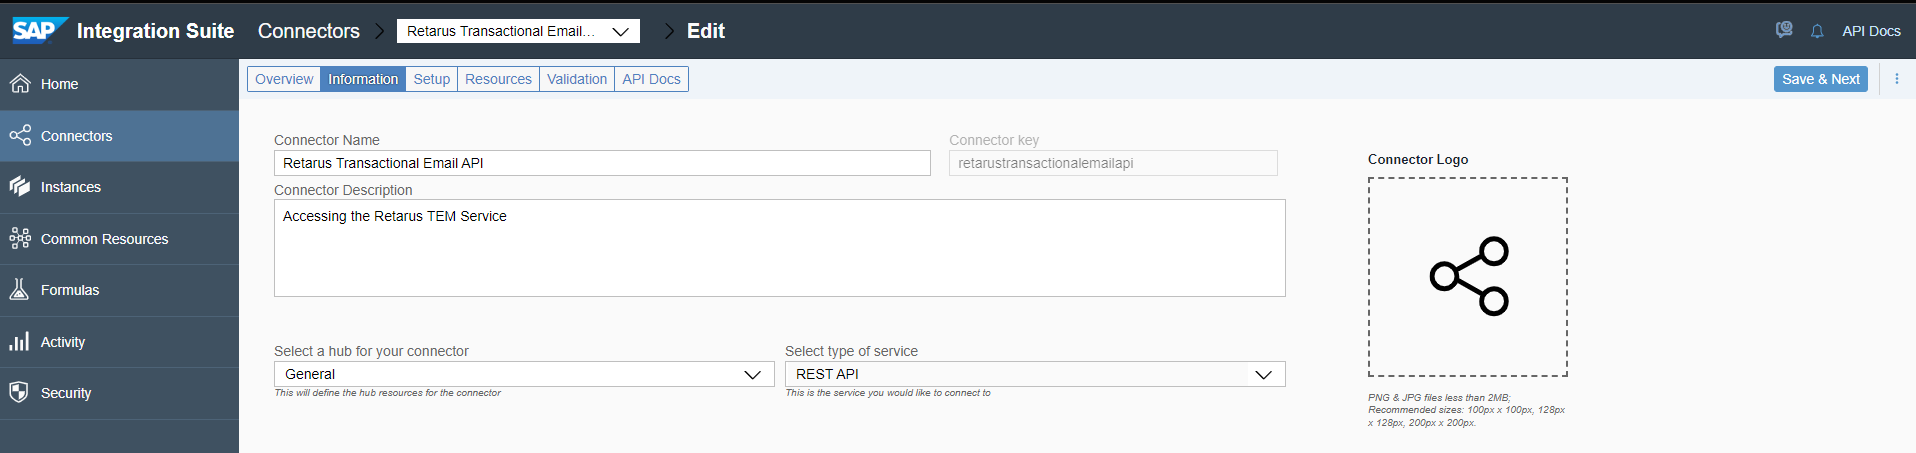
Additional information, such as a specific name for the new connector, can be included in the Information tab. To apply any updates, select Save & Next in the upper right corner.
Starting a connector instance
Now, the new connector should be turned into a working instance. As a result, it will become available via a SAP-native cloud URL with REST resource suffixes.
On the Integration Suite - Connectors page, select Create Instance.

The connector search widget opens.
Search for and select the previously created connector.

After choosing the connector, an instance initialization dialog appears.

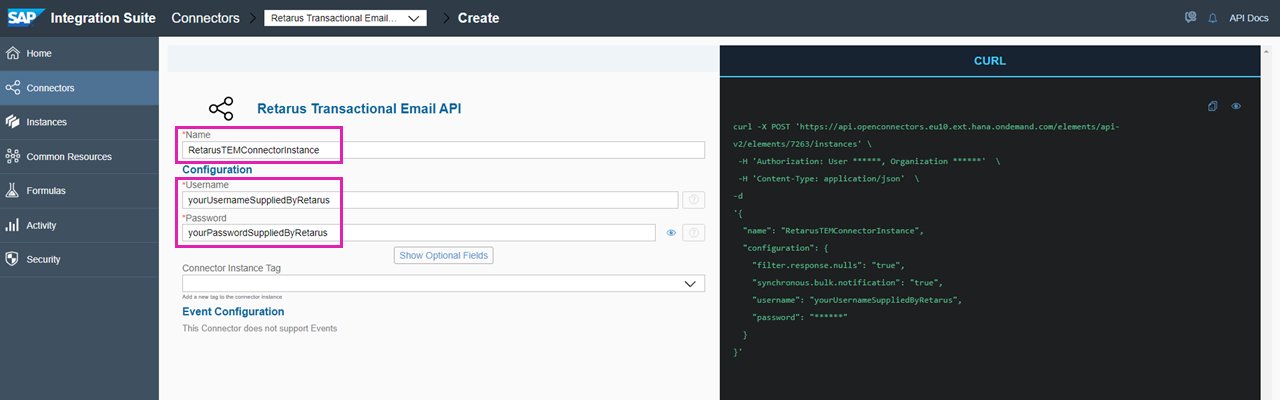
Enter the following information:
Name: The name of the currently running instance, which will be displayed in the instance overview later.
Username and Password: The Retarus Cloud Fax login ID credentials obtained from Retarus.
Select Create Instance at the bottom of the page.
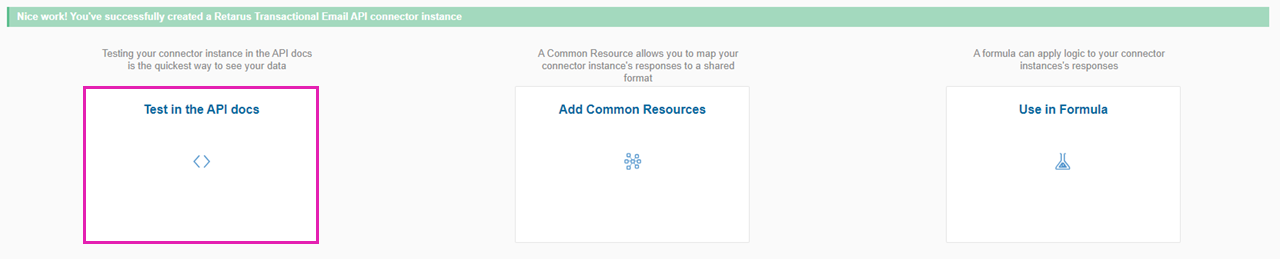
The connector should now be instantiated and running.

Select Test in the API docs to test the connector instance.
The blue box indicates the currently selected and authenticated instance.


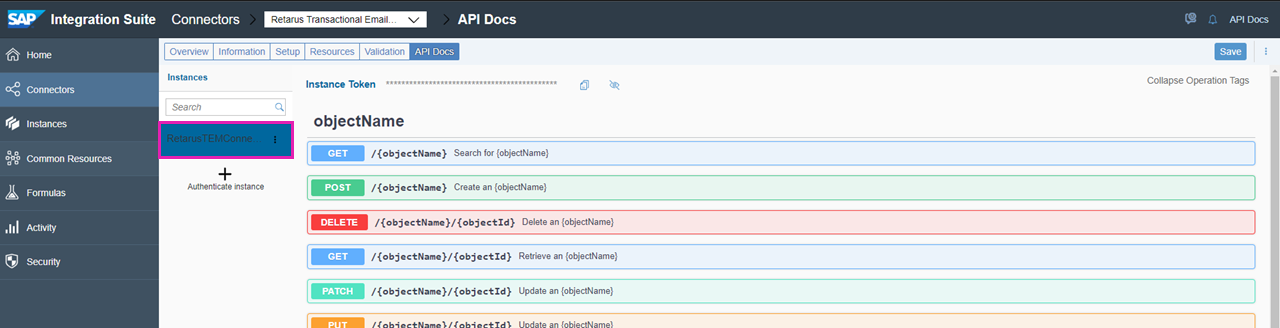
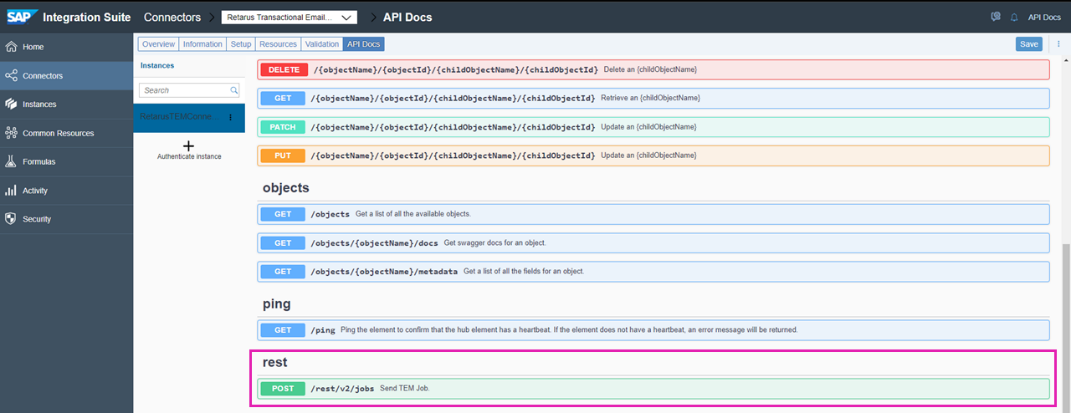
Verifying the connector’s connection
The Retarus Email API has only one POST method, which is located at the bottom of the list on the left. Scroll down to the rest section:

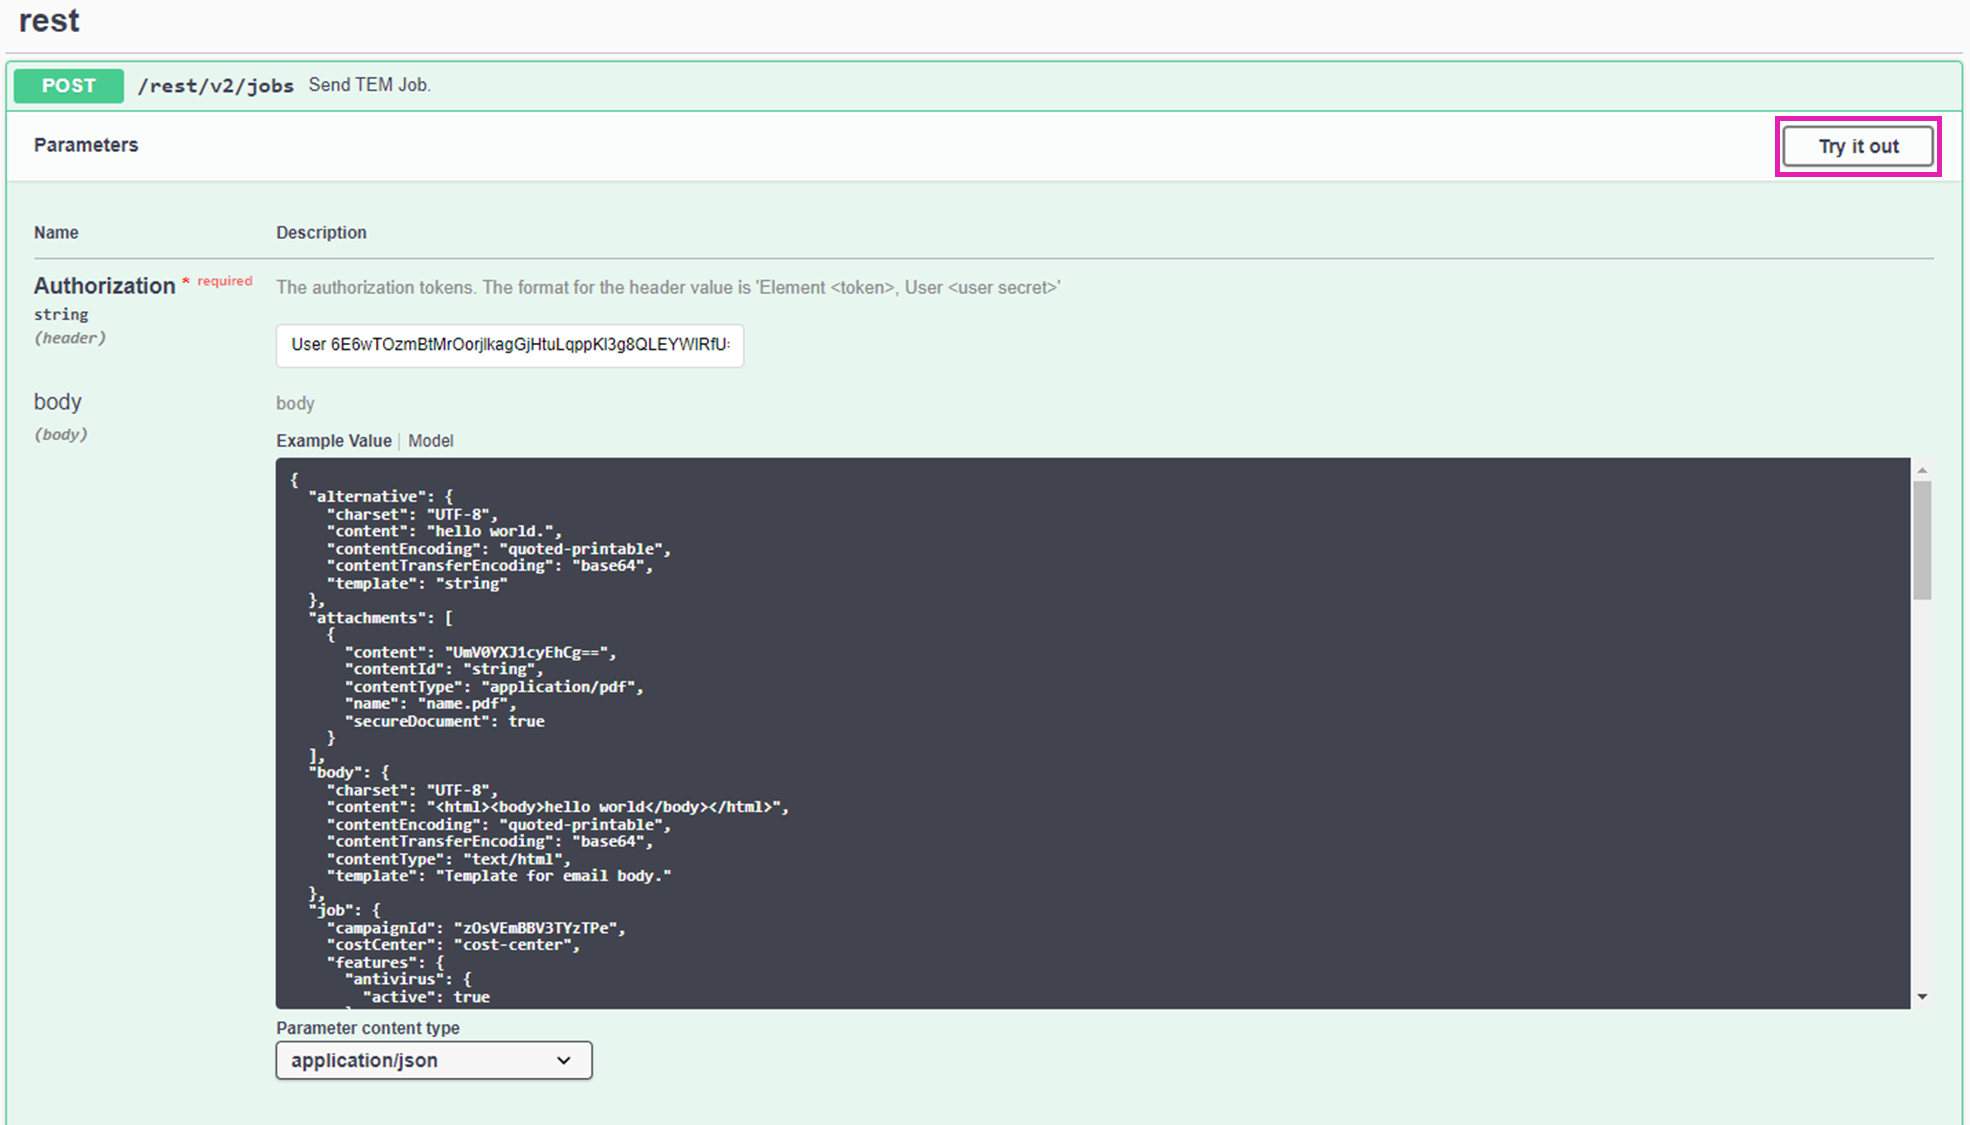
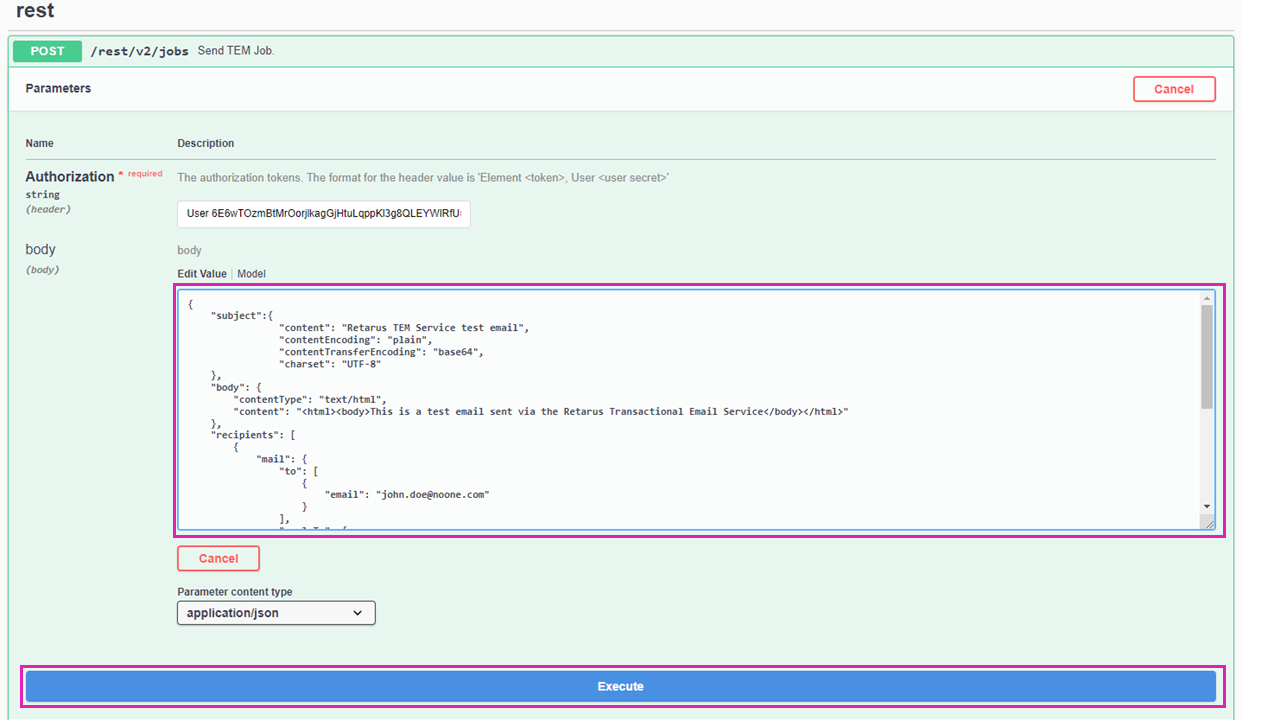
Click on the POST method to open it, and then select Try it out.

Upon clicking, the body field will become editable, indicated by its background color changing to white.
Since the sample body includes every possible feature that the Retarus Email API may offer — some of which are incompatible with one another — it is not immediately applicable.
Note: The default body will return an error response of 403 Forbidden if you try to use it as is. Nonetheless, this verifies that the connection to Retarus is active.For a quick and straightforward functional test, clear everything from the body field and paste the following code.
{ "subject":{ "content": "Retarus TEM Service test email", "contentEncoding": "plain", "contentTransferEncoding": "base64", "charset": "UTF-8" }, "body": { "contentType": "text/html", "content": "<html><body>This is a test email sent via the Retarus Transactional Email Service</body></html>" }, "recipients": [ { "mail": { "to": [ { "email": "john.doe@noone.com" } ], "replyTo": { "email": "jane.doe@retarus.com" }, "listUnsubscribe": "<mailto:jane.doe@retarus.com?subject=unsubscribe>, <https://example.com/unsubscribe.html>" } } ], "mail": { "from": { "email": "jane.doe@retarus.com" } }, "job": { "referenceJob": "TestEmail", "costCenter": "MyCostCenter" } }Note: To perform an actual test and receive the email, replace jane.doe@retarus.com with your source email address and john.doe@noone.com with a valid recipient email address.
Select Execute to send the job to Retarus Email.

If the operation is successful, an OK/200 response is shown, along with the Retarus Email job ID. Additionally, an email is sent to the specified mailbox.
Select **Cancel++ to end the test.
The connector is now up and running and can be used by other integration consumers.
Tips
Tip 1
In the response area, pay attention to the Curl section:
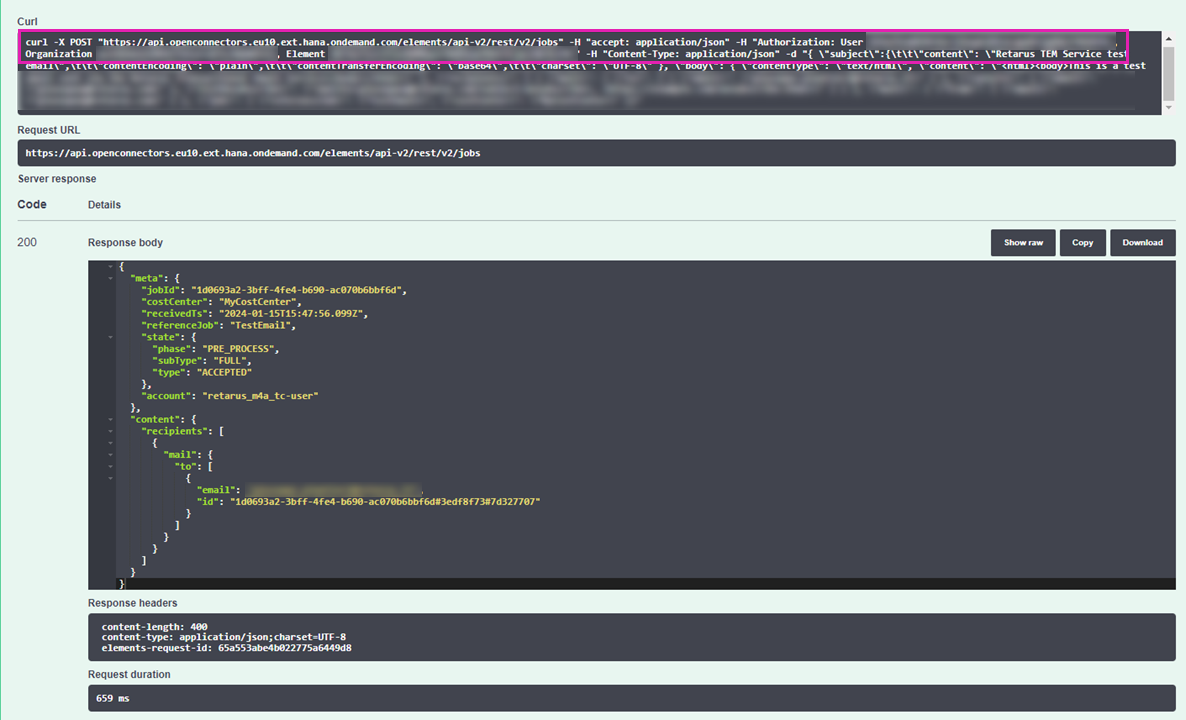
It displays the complete curl command that can be used in a DOS shell to send the job to Retarus. This section contains information valuable for future integrations. It is highly recommended to copy and safely store the following information:
SAP endpoint right after the POST command. It looks similar to https://api.openconnectors.eu10.ext.hana.ondemand.com/…. This endpoint is designated for SAP users who have permission to use this instance of the Retarus Email connector. Any jobs that are sent in the correct format to this endpoint are directly forwarded through the Email connector to Retarus Email.
User, Organization, and Element strings, as these are required to create the SAP credentials for using this connector in other SAP integrations (e.g., integration flows).
TIP 2
All Email features and options available in the default body during the test can be found in the corresponding Retarus documentation in the EAS portal.
If any concerns or issues arise, contact Retarus support and request assistance from an integration expert.